Schnelle und simple Methode um PNP4Nagios zu installieren in Icingaweb2
Am Anfang steht eine flinke Grundinstallation von Icinga2 + Icingaweb2 + NagiosPlugins + PNP4Nagios in einem aktuellen Centos 7.2 System.
Voraussetzung hier ist die benutzung eines Administrativen Benutzers:
# yum makecache fast -y
# yum install epel-release -y
# rpm -i https://packages.icinga.org/epel/7/release/noarch/icinga-rpm-release-7-1.el7.centos.noarch.rpm
# yum install icinga2 -y
# yum install httpd -y
# yum install icinga2-ido-mysql -y
# yum install icingacli -y
# yum install icingaweb2 -y
# yum install php-ldap -y
# yum install git -y
# yum install mariadb-server -y
# yum install wget -y
# yum install nagios-plugins-all
# systemctl enable icinga2
# systemctl enable httpd
# systemctl enable mariadb
# systemctl start httpd
# systemctl start icinga2
# systemctl start mariadb
# icinga2 feature enable command
Einrichten der Mysql Datenbank:
# mysql_secure_installation -> mit sinnvollen Eingaben
# mysql icinga2 < /usr/share/icinga2-ido-mysql/schema/mysql.sql
Hier in Mysql einloggen:
# mysql> GRANT SELECT, INSERT, UPDATE, DELETE, DROP, CREATE VIEW, INDEX, EXECUTE ON icinga2.* TO 'icinga'@'localhost' IDENTIFIED BY 'icinga';
# mysql> exit
Anpassen der ido-mysql.conf:
# vi /etc/icinga2/features-enabled/ido-mysql.conf
////////////////////////////////////////////////////
/**
 * The db_ido_mysql library implements IDO functionality
 * for MySQL.
 */

library "db_ido_mysql"

object IdoMysqlConnection "ido-mysql" {
  user = "icinga"
  password = "icinga"
  host = "localhost"
  database = "icinga2"
}
Nun kommen wir zur eigentlichen PNP4Nagios installation:
# yum install pnp4nagios -y
Danach sollte man die npcd.conf anpassen:
# vi /etc/pnp4nagios/npcd.cfg

////////////////////////////////////////////////////////////////
Dort ist unter dem Punkt Privilege Options der Benutzer anzupassen:
Anstelle von nagios sollte man icinga einsetzen.

//# Privilege Options

//user = nagios
//group = nagios

# Privilege Options

user = icinga
group = icinga
Danach noch das korrekte Spool verzeichnis angeben:
//# perfdata_spool_dir - where we can find the
//# performance data files
//#
//# perfdata_spool_dir = </path/to/directory/>
//#
//
//perfdata_spool_dir = /var/spool/pnp4nagios

Sollte dort folgendes eingetragen werden =>

# perfdata_spool_dir - where we can find the
# performance data files
#
# perfdata_spool_dir = </path/to/directory/>
#

perfdata_spool_dir = /var/spool/icinga2/perfdata
Nun kann man in Icinga2 die Perfdata optionen einschalten.
# icinga2 feature enable perfdata
# systemctl restart icinga2
Danach kann man direkt den npcd Service starten.
# systemctl enable npcd
# systemctl start npcd
# service npcd status
An dieser stelle sollten wir dafür Sorge tragen das das PNP Webfrontend erreichbar ist. Dazu müssen wir die Berechtigung im Apache2 anpassen:
# vi /etc/httpd/conf.d/pnp4nagios.conf
/////////////////////////////////////////////////////////////////////

//<Directory "/usr/share/nagios/html/pnp4nagios">
//        AllowOverride None
//        <IfModule mod_authz_core.c>
//                # Apache 2.4
//                <RequireAll>
//                        Require all granted
//                        Require valid-user
//                </RequireAll>
//        </IfModule>
//        <IfModule !mod_authz_core.c>
//                # Apache 2.2
//                Order allow,deny
//                Allow from all
//                Require valid-user
//        </IfModule>
//        #
//        # Use the same value as defined in nagios.conf
//        #
//        AuthName "Nagios Access"
//        AuthType Basic
//        AuthUserFile /etc/nagios/passwd
//        Require valid-user
//
/////////////////////////////////////////////////////////////////////

Folgenderweise Anpassen:

//<Directory "/usr/share/nagios/html/pnp4nagios">
//        AllowOverride None
//        <IfModule mod_authz_core.c>
//                # Apache 2.4
//                <RequireAll>
//                        Require all granted
//      #                  Require valid-user
//                </RequireAll>
//        </IfModule>
//        <IfModule !mod_authz_core.c>
//                # Apache 2.2
//                Order allow,deny
//                Allow from all
//      #          Require valid-user
//        </IfModule>
//        #
//        # Use the same value as defined in nagios.conf
//        #
//      #  AuthName "Nagios Access"
//      #  AuthType Basic
//      #  AuthUserFile /etc/nagios/passwd
//      #  Require valid-user
//
/////////////////////////////////////////////////////////////////////
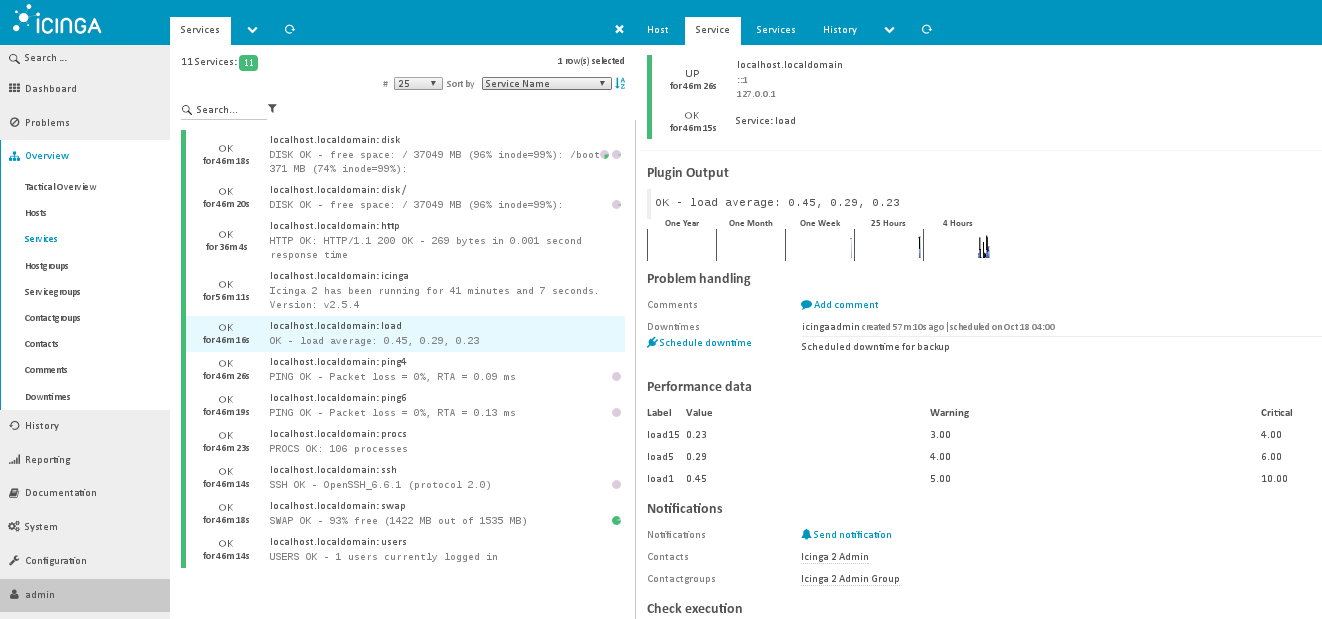
Es fehlt noch die möglichkeit die Graphen im Icingaweb2 auf den Services mit den Performancedaten anzuschauen.
Dazu muss das folgende Modul aus dem Git Repo geklont werden.
# cd /usr/share/icingaweb2/modules
# git clone https://github.com/icinga/icingaweb2-module-pnp pnp
In der Icingaweb2 GUI das Module enablen.
Und auf die gezeichneten Graphen schauen.